
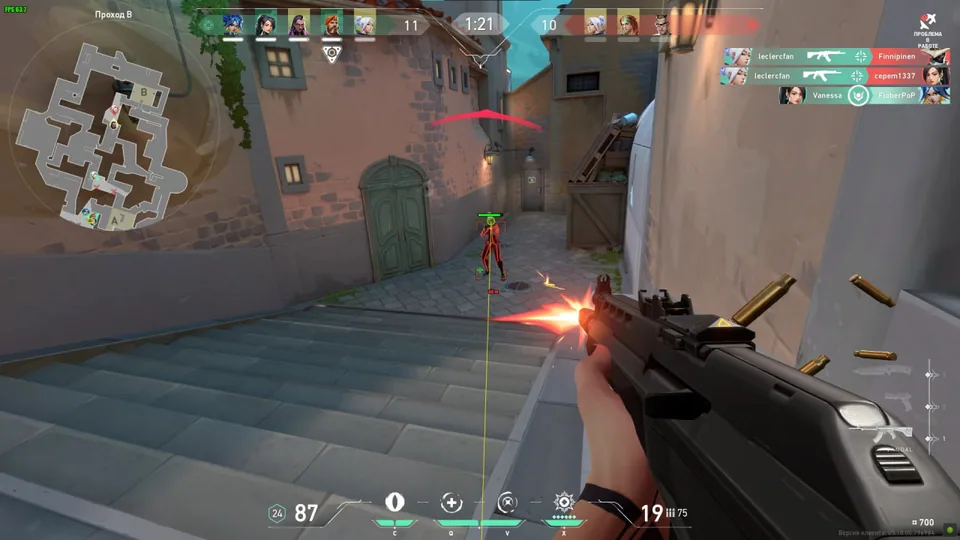
ESP Color and Distance Labels: How to Read a Crowded Screenshot
Distinguish marker colors, numeric distance, and maximum-distance limits without assuming that a screenshot documents every setting.
Color and distance information are easiest to read when every marker has a clear legend. The legend connects appearance to meaning; the distance label connects a value to a subject; a display limit controls the range described by the menu. This guide works through a screenshot-reading exercise that separates those roles and produces a useful reference for captions, comparisons, and display questions.
Start with the legend, not the color name
Choose a marker and identify the state or category its color represents. A color can be a user-selected style, a category label, or a state described in the interface. Record the relationship in words. A note saying selected marker is blue communicates more than a note saying blue is important, because it connects appearance with a named meaning.
Preserve the legend when cropping an illustration. Without it, the reader must work backward from the scene to guess why the marker has that appearance. A short caption can supply the necessary connection. Keep the caption tied to the exact indicator being discussed rather than applying the same meaning to every object that happens to share the color.
Use text or shape alongside color
An accessible legend gives the reader another way to identify the subject. Text labels, distinct shapes, or a clear position can support the color distinction. This is helpful in small screenshots, grayscale copies, and situations where neighboring colors look similar. The same principle improves the clarity of written documentation even when the interface illustration uses a strong palette.
For an annotated example, label the subject and the displayed value. Then describe the color’s role in the caption. The annotation remains readable if the image is viewed on another display or printed without its original colors. It also keeps the explanation focused on the information rather than turning a feature reference into a list of color preferences.
Compare contrast against the actual background
A marker is viewed against a scene, not against an empty color swatch. Bright areas, dark areas, textures, and neighboring interface elements affect how clearly a line or label can be read. When comparing screenshots, include enough surrounding context to show that background. A tightly cropped symbol can hide the reason a label looks clear in one image and crowded in another.
Distinguish text size from contrast. Larger text occupies more space, while stronger contrast changes the relationship between foreground and background. These are different aspects of presentation. A useful display note identifies which one is being discussed. The related visual indicator reference explains the subjects and values that those presentation choices are intended to organize.
Separate measured distance from a display boundary
A numeric distance beside a marker reports a displayed value. A maximum-distance control describes a boundary associated with that display. Keep them on different rows in your reference. A marker labeled 30 m and a control labeled maximum distance concern related concepts, but one is an observation within the display and the other is a menu parameter.
Read the unit as part of the number. Distance values expressed in different units require a conversion before comparison. Also keep the subject attached: a player-distance label and an ability-distance label concern different objects. Writing the full name prevents a small screenshot crop from turning several unrelated values into a single ambiguous range entry.
Keep original image dimensions
Before comparing font sizes or marker coverage, record the image’s original resolution. Resizing a screenshot changes the apparent size of every element together. Two previews displayed at the same width can come from different source dimensions. Keeping the original sizes lets you describe the illustrations accurately rather than comparing only their appearance inside a web page layout.
Add the crop information when relevant. A crop can remove a subject label, legend, or neighboring marker that explains the layout. For a reference document, keep the uncropped image privately and use a readable crop for the specific question. Name both files clearly so the relationship between the focused illustration and its source remains easy to follow.
Diagnose a crowded label cluster
Take an image containing a name, health bar, equipment label, and distance near the same subject. Identify the reading order first. Then connect each label to the marker it describes. Look for overlapping baselines, similar text colors, and neighboring values that could be mistaken for one another. Record the exact pair of elements involved instead of calling the whole display unreadable.
Write an annotation such as distance overlaps equipment label at the shown scale. This names a relationship that another person can locate in the image. A general complaint about clutter gives fewer clues. The useful record contains the subject, the two overlapping elements, the image dimensions, and the relevant menu labels. Those fields turn a visual impression into a concrete documentation question.
Build a consistent caption style
A caption should identify the subject, indicator, and context in one short passage. For example, name the player-distance label, its unit, and the image dimensions when the question concerns text readability. For a color example, name the state represented by the color and point to the legend. Each caption should describe the image actually shown rather than repeat a broad product headline.
Keep captions consistent across a comparison. Use the same order of information so the reader can find the important difference quickly. This also makes a collection easier to update because a revised image can be checked against the same fields. The caption becomes a small reference record, not an extra paragraph of repeated keywords around every screenshot.
Complete the reading exercise
Finish with one legend row per marker and a separate list of the presentation issues you observed. Keep values, units, and subjects together. Keep image dimensions, crop, and contrast notes in the illustration record. These two records serve different purposes but connect through the marker name. The result is a display reference that can be understood without access to the original editing session.
For broader visual naming, use the wallhack and ESP comparison. For a map-based display, use the radar orientation guide. This exercise stays focused on reading colors, distance labels, and presentation limits clearly enough to prepare a useful caption or ask a specific display question.